vsomeip 是 GENIVI 实现的开源 SOME/IP 库,由 C++ 编写,目前主要实现了 SOME/IP 的通信和服务发现功能,并在此基础上增加了少许的安全机制。
GENIVI是一个联盟组织,由 BMW 倡导,是汽车信息娱乐领域系统软件标准的倡导者,创建基于linux 系统的 IVI 软件平台和操作系统。GENIVI 倡导了很多开源软件项目,比如:DLT、CommonAPI C++、vSOMEIP。
vsomeip 概述
简单了解一下 vsomeip的基本结构。

如图所示,vsomeip 不仅涵盖了设备之间的 SOME/IP 通信(外部通信),还涵盖了内部进程间通信。两个设备通过communication endpoints(通信端点)进行通信,endpoints 确定传输使用的协议(TCP 或 UDP)及端口号或其他参数。所有这些参数都是可以在 vsomeip 配置文件中设置的(配置文件是 json 格式)。内部通信是通过本地 endpoints 完成的,这些 endpoints 由 unix 域套接字使用 Boost.Asio 库实现。由于这种内部通信不是通过中心组件 (例如 D-Bus 守护进程) 路由的,所以它非常快。
中央 vsomeip 路由管理器(routing manager)只接收必须发送到外部设备的消息,并分发来自外部的消息。每个设备只有一个路由管理器,如果没有配置,那么第一个运行的 vsomeip 应用程序也会启动路由管理器。
vsomeip 部署安装
以下操作在 Ubuntu 16.04 虚拟机上进行。
vsomeip 需要:
1、一个支持c++ 11的编译器,比如 gcc >= 4.8。
2、使用 CMake 作为构建系统。
3、Boost >= 1.55。
sudo apt-get install libboost-system1.55-dev libboost-thread1.55-dev libboost-log1.55-dev
编译 vsomeip 前先还需要安装一些其他依赖,像是要构建文档需要的 asciidoc,source-highlight、doxygen 和 graphviz:
sudo apt-get install source-highlight doxygen graphviz
sudo apt-get --no-install-recommends install asciidoc
编译:
git clone https://github.com/COVESA/vsomeip.git
cd vsomeip
<.>/vsomeip$ mkdir build
<.>/vsomeip$ cd build
<.>/vsomeip/build$ cmake -DENABLE_SIGNAL_HANDLING=1 ..
<.>/vsomeip/build$ make
<.>/vsomeip/build$ make install
cmake 命令中添加的参数 -DENABLE_SIGNAL_HANDLING=1 可以确保终止 vsomeip 应用程序的时候不出问题,否则当使用 Ctrl-c 停止应用时,共享内存段 /dev/shm/vsomeip 可能未被正确删除。
经过以上操作就编译出 vsomeip 库了。
入门示例演示
创建第一个 vsomeip 应用 service-example,它的唯一功能就是初始化并启动一个名叫 “World”的应用。
首先创建一个 service-example.cpp,代码如下:
#include <vsomeip/vsomeip.hpp>
std::shared_ptr< vsomeip::application > app;
int main() {
app = vsomeip::runtime::get()->create_application("World");
app->init();
app->start();
}
上面代码中,首先创建了一个 application 对象,然后调用 init() 和 start() 分别进行初始化和启动。需要注意,在创建 application 后,必须首先调用 init 方法,初始化时会执行以下几步:
- 加载配置。
- 确定路由配置和路由的初始化。
- 安装信号处理程序。
为了启动消息处理,必须在 init 之后调用 start 方法。接收到的消息通过套接字进行处理,并使用已注册的回调函数将它们传递给用户 application。
接下来创建一个 CMakeLists.txt 文件来构建 service-example 应用。
cmake_minimum_required (VERSION 2.8)
set (CMAKE_CXX_FLAGS "-g -std=c++0x")
find_package (vsomeip 2.6.0 REQUIRED)
find_package( Boost 1.55 COMPONENTS system thread log REQUIRED )
include_directories (
${Boost_INCLUDE_DIR}
${VSOMEIP_INCLUDE_DIRS}
)
add_executable(service-example ../src/service-example.cpp)
target_link_libraries(service-example vsomeip ${Boost_LIBRARIES})
上述 CMakeLists.txt 文件中部分项解释如下:
cmake_minimum_required # 指定 cmake 的最小版本
CMAKE_CXX_FLAGS # 设置编译选项 ,如果编译器支持 -std=c++11,则没有理由使用 -std=c++0x。
find_package # 查找到指定的预编译库,并将它的路径存储在变量中。默认的搜索路径为 cmake 包含的系统库,因此如果是 NDK 的公共库只需要指定库的 name 即可
include_directories # 设置包含的目录
add_executable # 生成可执行文件
target_link_libraries # 设置 target 需要链接的库
service-example.cpp 和 CMakeLists.txt 写好之后,在同目录下创建一个 build 文件夹,在 build 文件夹中运行 cmake -DENABLE_SIGNAL_HANDLING=1 .. ,再执行 make。
不过直接使用项目中的 CMakeLists.txt 时会报错,最终修改如下:
cmake_minimum_required (VERSION 2.8.7)
project (vSomeIPServiceExample)
set(CMAKE_CXX_FLAGS "${CMAKE_CXX_FLAGS} -std=c++11")
find_package(Threads REQUIRED)
include_directories("/home/ml/car/vsomeip")
link_directories("/usr/local/lib")
include_directories(${VSOMEIP_INCLUDE_DIRS})
include_directories(${Boost_INCLUDE_DIR})
find_package(vsomeip3 REQUIRED)
add_executable(service-example ../service-example.cpp)
target_link_libraries(service-example vsomeip3 pthread)
#add_executable (client-example ../client-example.cpp)
#target_link_libraries(client-example vsomeip ${Boost_LIBRARIES})
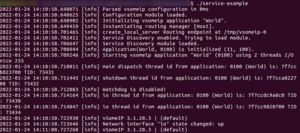
运行之后会打印如下内容:

这些步骤对于服务和客户端是相同的,没有区别。到目前为止,不需要任何配置文件。
再来看看输出中的一些细节:
- 首先显示已经加载的配置,不过由于我们没有配置,所以这里会使用默认值。
- 由于路由管理器(routing manager)也没有配置,因此,路由管理器会在系统中的第一个vsomeip应用程序 (即 service-example) 启动时自动启动。
- 默认情况下,Service Discovery 会启用,不过没有静态路由,这需要一些配置参数。
- Application(World, 0100) is initialized (11,100)。最后的两个数字表示如果回调阻塞超过100毫秒,则 vsomeip 使用的最大调度程序数量为 11。这些参数可以配置。
- 默认情况下,会创建了两个线程来接收 SOME/IP消息,这使得 vsomeip 可以并行处理长消息。
假设 service-example 在服务端并且需要编写一个使用该服务的客户端。第一步,必须触发应用程序提供服务实例,可以通过在之前的示例中添加一个offer_service函数来完成。
#include <vsomeip/vsomeip.hpp>
#define SAMPLE_SERVICE_ID 0x1234
#define SAMPLE_INSTANCE_ID 0x5678
std::shared_ptr< vsomeip::application > app;
int main() {
app = vsomeip::runtime::get()->create_application("World");
app->init();
app->offer_service(SAMPLE_SERVICE_ID, SAMPLE_INSTANCE_ID);
app->start();
}
接下来,编写一个客户端应用程序来检测正在运行的“World“应用程序是否可用,这里创建一个名为 client-example.cpp 的文件:
#include <iomanip>
#include <iostream>
#include <vsomeip/vsomeip.hpp>
#define SAMPLE_SERVICE_ID 0x1234
#define SAMPLE_INSTANCE_ID 0x5678
std::shared_ptr< vsomeip::application > app;
void on_availability(vsomeip::service_t _service, vsomeip::instance_t _instance, bool _is_available) {
std::cout << "Service ["
<< std::setw(4) << std::setfill('0') << std::hex << _service << "." << _instance
<< "] is " << (_is_available ? "available." : "NOT available.") << std::endl;
}
int main() {
app = vsomeip::runtime::get()->create_application("Hello");
app->init();
app->register_availability_handler(SAMPLE_SERVICE_ID, SAMPLE_INSTANCE_ID, on_availability);
app->request_service(SAMPLE_SERVICE_ID, SAMPLE_INSTANCE_ID);
app->start();
}
在 CMakeLists.txt 中添加两句:
add_executable (client-example ../client-example.cpp)
target_link_libraries(client-example vsomeip3 pthread)
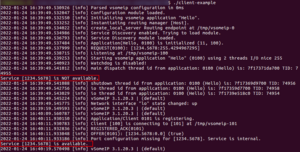
编译后只执行 client-example,打印第一个红框,在另一个终端中启动 service-example 之后,打印中出现第二个红框:

为了使其尽可能简单,代码中省略了所有可能的检查,例如没有检查注册是否成功。作为客户端,要想告诉 vsomeip 自己想使用这个服务,客户端就需要注册一个回调函数以便在服务可用时获得一个回调,在本例中,回调函数就是 on_availability。

Request/Response 示例
上面的 vsomeip 应用程序中,我们创建了一个提供服务接口实例的服务端程序和一个想要使用这个接口的客户端程序。
下一步将在服务端实现一个可由客户端调用的函数。为此服务端必须为接收消息做好准备,可以通过注册消息处理程序(register_message_handler)来实现。编写代码如下:
service-example.cpp
#include <iomanip>
#include <iostream>
#include <sstream>
#include <vsomeip/vsomeip.hpp>
#define SAMPLE_SERVICE_ID 0x1234
#define SAMPLE_INSTANCE_ID 0x5678
#define SAMPLE_METHOD_ID 0x0421
std::shared_ptr<vsomeip::application> app;
void on_message(const std::shared_ptr<vsomeip::message> &_request) {
std::shared_ptr<vsomeip::payload> its_payload = _request->get_payload();
vsomeip::length_t l = its_payload->get_length();
// Get payload
std::stringstream ss;
for (vsomeip::length_t i=0; i<l; i++) {
ss << std::setw(2) << std::setfill('0') << std::hex
<< (int)*(its_payload->get_data()+i) << " ";
}
std::cout << "SERVICE: Received message with Client/Session ["
<< std::setw(4) << std::setfill('0') << std::hex << _request->get_client() << "/"
<< std::setw(4) << std::setfill('0') << std::hex << _request->get_session() << "] "
<< ss.str() << std::endl;
// Create response
std::shared_ptr<vsomeip::message> its_response = vsomeip::runtime::get()->create_response(_request);
its_payload = vsomeip::runtime::get()->create_payload();
std::vector<vsomeip::byte_t> its_payload_data;
for (int i=9; i>=0; i--) {
its_payload_data.push_back(i % 256);
}
its_payload->set_data(its_payload_data);
its_response->set_payload(its_payload);
app->send(its_response);
}
int main() {
app = vsomeip::runtime::get()->create_application("World");
app->init();
app->register_message_handler(SAMPLE_SERVICE_ID, SAMPLE_INSTANCE_ID, SAMPLE_METHOD_ID, on_message);
app->offer_service(SAMPLE_SERVICE_ID, SAMPLE_INSTANCE_ID);
app->start();
}
服务端提供 message_handler 和 offer 功能。
register_message_handler函数在 \vsomeip-master\interface\vsomeip\application.hpp 中的定义描述为:
virtual void register_message_handler(service_t _service,
instance_t _instance, method_t _method,
message_handler_t _handler) = 0;
为指定的 method 或 event 注册处理程序。用户应用程序必须调用此方法来为其注册回调。
注:
每个服务(SERVICE)、实例(INSTANCE)、方法/事件(METHOD)组合只能注册一个处理程序。
offer_service函数在 \vsomeip-master\interface\vsomeip\application.hpp 中的定义描述为:
virtual void offer_service(service_t _service, instance_t _instance,
major_version_t _major = DEFAULT_MAJOR, minor_version_t _minor =
DEFAULT_MINOR) = 0;
参数 _service:service标识符;
参数 _instance:提供的服务实例的实例标识符;
参数 _major:主服务版本号(默认为0);
参数 _minor:次服务版本号(默认为0)。
offer_service 函数的作用是将service 注册到 vsomeip 路由组件上,从而使感兴趣的客户端可以看到该服务,因此用户应用程序必须为它提供的每个 service 调用offer_service这个方法。根据配置,service有两种模式,一种是只能在内部网络中可用的,另一种是在内部和外部均可使用。为了向外部网络提供服务,配置中必须包含提供服务实例的端口,如果没有提供这样的端口配置,服务在设备外部是不可见的。
再来看客户端,request-example.cpp 中包含 message handler 和 send 功能,代码如下:
#include <iomanip>
#include <iostream>
#include <sstream>
#include <condition_variable>
#include <thread>
#include <vsomeip/vsomeip.hpp>
#define SAMPLE_SERVICE_ID 0x1234
#define SAMPLE_INSTANCE_ID 0x5678
#define SAMPLE_METHOD_ID 0x0421
std::shared_ptr< vsomeip::application > app;
std::mutex mutex;
std::condition_variable condition;
void run() {
std::unique_lock<std::mutex> its_lock(mutex);
condition.wait(its_lock);
std::shared_ptr< vsomeip::message > request;
request = vsomeip::runtime::get()->create_request();
request->set_service(SAMPLE_SERVICE_ID);
request->set_instance(SAMPLE_INSTANCE_ID);
request->set_method(SAMPLE_METHOD_ID);
std::shared_ptr< vsomeip::payload > its_payload = vsomeip::runtime::get()->create_payload();
std::vector< vsomeip::byte_t > its_payload_data;
for (vsomeip::byte_t i=0; i<10; i++) {
its_payload_data.push_back(i % 256);
}
its_payload->set_data(its_payload_data);
request->set_payload(its_payload);
app->send(request);
}
void on_message(const std::shared_ptr<vsomeip::message> &_response) {
std::shared_ptr<vsomeip::payload> its_payload = _response->get_payload();
vsomeip::length_t l = its_payload->get_length();
// Get payload
std::stringstream ss;
for (vsomeip::length_t i=0; i<l; i++) {
ss << std::setw(2) << std::setfill('0') << std::hex
<< (int)*(its_payload->get_data()+i) << " ";
}
std::cout << "CLIENT: Received message with Client/Session ["
<< std::setw(4) << std::setfill('0') << std::hex << _response->get_client() << "/"
<< std::setw(4) << std::setfill('0') << std::hex << _response->get_session() << "] "
<< ss.str() << std::endl;
}
void on_availability(vsomeip::service_t _service, vsomeip::instance_t _instance, bool _is_available) {
std::cout << "CLIENT: Service ["
<< std::setw(4) << std::setfill('0') << std::hex << _service << "." << _instance
<< "] is "
<< (_is_available ? "available." : "NOT available.")
<< std::endl;
condition.notify_one();
}
int main() {
app = vsomeip::runtime::get()->create_application("Hello");
app->init();
app->register_availability_handler(SAMPLE_SERVICE_ID, SAMPLE_INSTANCE_ID, on_availability);
app->request_service(SAMPLE_SERVICE_ID, SAMPLE_INSTANCE_ID);
app->register_message_handler(SAMPLE_SERVICE_ID, SAMPLE_INSTANCE_ID, SAMPLE_METHOD_ID, on_message);
std::thread sender(run);
app->start();
}
与服务端的代码一样,在客户端代码中我们也需要调用 register_message_handler 注册一个消息处理程序,用来接收服务器对客户端请求的响应。原则上,创建请求消息非常容易。只需通过调用 create_request() 获取请求对象,设置 service ID、instance ID 和 method ID,并在最后将序列化的数据写入payload。在上面这个示例中,我们将 0 到 9 的值写入有效负载(std::vector< vsomeip::byte_t >)。
上述代码中出现 “std::thread sender(run);” 的原因是:当我们尝试将请求从客户端发送给服务时,遇到了一个小问题。在发送消息之前必须启动应用程序(app->start()),因为我们需要一个正在运行的事件循环来处理消息。但是该方法 app->start() 不会返回,因为它内部有正在运行的事件循环。因此,就需要启动一个线程(run),并在此线程中等待 availability 回调的返回,然后再调用app->send(request)。
上述两个cpp文件还有 CMakeLists.txt 写好之后,在同目录下创建一个 build 文件夹,在 build 文件夹中运行 cmake -DENABLE_SIGNAL_HANDLING=1 .. ,再执行 make。
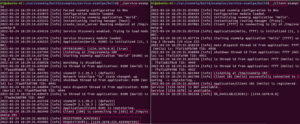
先执行 service-example 再执行 request-example 之后,结果如下:

Subscribe/Notify 示例
在以下 Subscribe/Notify(订阅/通知)示例中,
先来看服务端代码:
#include <iomanip>
#include <iostream>
#include <sstream>
#include <vsomeip/vsomeip.hpp>
#define SAMPLE_EVENTGROUP_ID 0x3333
#define SAMPLE_SERVICE_ID 0x1234
#define SAMPLE_INSTANCE_ID 0x5678
#define SAMPLE_EVENT_ID 0x4444
std::shared_ptr<vsomeip::application> app;
int main() {
app = vsomeip::runtime::get()->create_application("World");
app->init();
app->offer_service(SAMPLE_SERVICE_ID, SAMPLE_INSTANCE_ID);
const vsomeip::byte_t its_data[] = { 0x22 };
std::shared_ptr<vsomeip::payload> payload = vsomeip::runtime::get()->create_payload();
payload->set_data(its_data, sizeof(its_data));
std::set<vsomeip::eventgroup_t> its_groups;
its_groups.insert(SAMPLE_EVENTGROUP_ID);
app->offer_event(SAMPLE_SERVICE_ID, SAMPLE_INSTANCE_ID, SAMPLE_EVENT_ID, its_groups);
app->notify(SAMPLE_SERVICE_ID, SAMPLE_INSTANCE_ID, SAMPLE_EVENT_ID, payload);
app->start();
}
注意在 offer_event 之前 offer_service 不可或缺。
客户端代码如下:
#include <iomanip>
#include <iostream>
#include <sstream>
#include <condition_variable>
#include <thread>
#include <vsomeip/vsomeip.hpp>
#define SAMPLE_EVENTGROUP_ID 0x3333
#define SAMPLE_SERVICE_ID 0x1234
#define SAMPLE_INSTANCE_ID 0x5678
#define SAMPLE_EVENT_ID 0x4444
std::shared_ptr< vsomeip::application > app;
std::mutex mutex;
std::condition_variable condition;
void run() {
std::unique_lock<std::mutex> its_lock(mutex);
condition.wait(its_lock);
std::set<vsomeip::eventgroup_t> its_groups;
its_groups.insert(SAMPLE_EVENTGROUP_ID);
app->request_event(SAMPLE_SERVICE_ID, SAMPLE_INSTANCE_ID, SAMPLE_EVENT_ID, its_groups);
app->subscribe(SAMPLE_SERVICE_ID, SAMPLE_INSTANCE_ID, SAMPLE_EVENTGROUP_ID);
}
void on_message(const std::shared_ptr<vsomeip::message> &_response) {
std::stringstream its_message;
its_message << "CLIENT: received a notification for event ["
<< std::setw(4) << std::setfill('0') << std::hex
<< _response->get_service() << "."
<< std::setw(4) << std::setfill('0') << std::hex
<< _response->get_instance() << "."
<< std::setw(4) << std::setfill('0') << std::hex
<< _response->get_method() << "] to Client/Session ["
<< std::setw(4) << std::setfill('0') << std::hex
<< _response->get_client() << "/"
<< std::setw(4) << std::setfill('0') << std::hex
<< _response->get_session()
<< "] = ";
std::shared_ptr<vsomeip::payload> its_payload = _response->get_payload();
its_message << "(" << std::dec << its_payload->get_length() << ") ";
for (uint32_t i = 0; i < its_payload->get_length(); ++i)
its_message << std::hex << std::setw(2) << std::setfill('0')
<< (int) its_payload->get_data()[i] << " ";
std::cout << its_message.str() << std::endl;
}
void on_availability(vsomeip::service_t _service, vsomeip::instance_t _instance, bool _is_available) {
std::cout << "CLIENT: Service ["
<< std::setw(4) << std::setfill('0') << std::hex << _service << "." << _instance
<< "] is "
<< (_is_available ? "available." : "NOT available.")
<< std::endl;
condition.notify_one();
}
int main() {
app = vsomeip::runtime::get()->create_application("Hello");
app->init();
app->register_availability_handler(SAMPLE_SERVICE_ID, SAMPLE_INSTANCE_ID, on_availability);
app->request_service(SAMPLE_SERVICE_ID, SAMPLE_INSTANCE_ID);
app->register_message_handler(SAMPLE_SERVICE_ID, SAMPLE_INSTANCE_ID, SAMPLE_EVENT_ID, on_message);
std::thread sender(run);
app->start();
}

两个设备间的通信
要实现两个设备间的通信,无需修改 c++ 代码,不过需要编写配置文件。
配置文件是由 json 格式编写的,默认配置文件是 /etc/vsomeip.json,默认配置文件夹是 /etc/vsomeip。不过如果可执行文件同目录下存在 ./vsomeip.json 或 ./vsomeip 文件夹时,则用本地的配置文件。如果环境变量 “VSOMEIP_CONFIGURATION” 设为有效的文件或目录路径,则会使用该环境变量中所指定的配置(此时既不会使用默认文件/文件夹,也不会使用本地文件/文件夹)。
在下面的配置示例中,服务器和客户端程序分别运行在两台 ubuntu 16.04 的虚拟机上,服务端所在虚拟机地址为 192.168.24.132 的设备上,客户端地址为 192.168.24.129。
首先,看一下服务器端配置的示例。
{
"unicast" : "192.168.24.132",
"logging" :
{
"level" : "debug",
"console" : "true",
"file" : { "enable" : "false", "path" : "/tmp/vsomeip.log" },
"dlt" : "false"
},
"applications" :
[
{
"name" : "World",
"id" : "0x1212"
}
],
"services" :
[
{
"service" : "0x1234",
"instance" : "0x5678",
"unreliable" : "30509"
}
],
"routing" : "World",
"service-discovery" :
{
"enable" : "true",
"multicast" : "224.224.224.245",
"port" : "30490",
"protocol" : "udp",
"initial_delay_min" : "10",
"initial_delay_max" : "100",
"repetitions_base_delay" : "200",
"repetitions_max" : "3",
"ttl" : "3",
"cyclic_offer_delay" : "2000",
"request_response_delay" : "1500"
}
}
对其中的部分项进行说明:
- 对于 IP 通信,单播(unicast )地址是必须的。
- logging:这里面的设置是可选的,设置 “console”=true 可以查看控制台上的日志消息。
- applications:可以为每个 application (application 是通过 create_application(<name>) 创建的) 定义固定的 ID,而不是由自动配置决定。这将有助于在后续跟踪中有效识别出 applications。applications 中 id 是必须设置的,因为这个值在网络中必须是惟一的。如果不设置该 id,自动配置将把每个设备上的 id 都设置为 1,通信将无法工作。
- services:对于每个服务实例(service instance),必须定义在哪个端口下可以访问它。如果端口为“unreliable”,则说明是 UDP 端口,如果端口为“reliable”,则是 TCP 端口。
- routing:每个设备只有一个路由管理器。这个路由管理器将被附加到第一个启动的vsomeip 应用程序或该项定义的应用程序。
- service-discovery:这里的所有参数只有在启用服务发现时才用得上。其中必选参数为发送服务发现消息的组播地址(multicast)、端口(port)和协议(protocol)。其他参数决定 offer messages 的频率、延迟等等。
注意:需确保设备已配置为接收组播消息(例如,通过route add -nv 224.224.224.245 dev ens33 或类似配置)。
再来看下客户端配置示例:
{
"unicast" : "192.168.24.129",
"logging" :
{
"level" : "debug",
"console" : "true",
"file" : { "enable" : "false", "path" : "/var/log/vsomeip.log" },
"dlt" : "false"
},
"applications" :
[
{
"name" : "Hello",
"id" : "0x1313"
}
],
"routing" : "Hello",
"service-discovery" :
{
"enable" : "true",
"multicast" : "224.224.224.245",
"port" : "30490",
"protocol" : "udp",
"initial_delay_min" : "10",
"initial_delay_max" : "100",
"repetitions_base_delay" : "200",
"repetitions_max" : "3",
"ttl" : "3",
"cyclic_offer_delay" : "2000",
"request_response_delay" : "1500"
}
}
接下来在两台虚拟机上测试一下之前的 3 个示例是否都可以正常运行。
下面的几个 Tips 记录了在实践时遇到的问题及解决方案。
Tips 1:
在两台虚拟机上测试“第一个示例演示”的时候,如果将配置文件放在可执行文件同目录的时候配置并不生效,那就通过以下方式指定配置文件
VSOMEIP_CONFIGURATION=./vsomeip-local.json ./service_example
使用 Wireshark 对 Vmware Network Adapter VMnet8 进行抓包,可见通信正常:

Tips 2:
在测试 “Request/Response 示例”的时候,出现的问题是:
Request/Response 示例中虽然客户端可以检测到服务器端程序上线可用了,但是它们不互相发送 payload。
本来以为是没有添加静态路由,但是执行 route add -nv 224.224.224.245 dev ens33 后问题还是存在。
参考 https://github.com/COVESA/vsomeip/issues/44 中的一条评论,这个问题出现的原因在客户端代码中的 on_availability 函数。
void on_availability(vsomeip::service_t _service, vsomeip::instance_t _instance, bool _is_available) {
std::cout << "CLIENT: Service ["
<< std::setw(4) << std::setfill('0') << std::hex << _service << "." << _instance
<< "] is "
<< (_is_available ? "available." : "NOT available.")
<< std::endl;
condition.notify_one();
}
当客户端和服务都在同一台计算机上时,运行程序没有问题。但是当程序运行在两台机器上时,需要修改代码如下:
void on_availability(vsomeip::service_t _service, vsomeip::instance_t _instance, bool _is_available) {
std::cout << "CLIENT: Service ["
<< std::setw(4) << std::setfill('0') << std::hex << _service << "." << _instance
<< "] is "
<< (_is_available ? "available." : "NOT available.")
<< std::endl;
if(_is_available) {
condition.notify_one();
}
}
使用 Wireshark 对 Vmware Network Adapter VMnet8 进行抓包,通信正常:

Tips 3:
在测试“Subscribe/Notify 示例”的时候,需要在服务端的配置文件中添加 event 和 eventgroup 才可以。
服务端的配置文件如下:
{
"unicast" : "192.168.24.132",
"logging" :
{
"level" : "debug",
"console" : "true",
"file" : { "enable" : "false", "path" : "/tmp/vsomeip.log" },
"dlt" : "false"
},
"applications" :
[
{
"name" : "World",
"id" : "0x1212"
}
],
"services" :
[
{
"service" : "0x1234",
"instance" : "0x5678",
"unreliable" : "30509",
"events" :
[
{
"event" : "0x4444",
"is_field" : "false",
"update-cycle" : 2000,
"is_reliable" : "false"
}
],
"eventgroups" :
[
{
"eventgroup" : "0x3333",
"events" : [ "0x4444" ],
"is_multicast" : "true"
}
]
}
],
"routing" : "World",
"service-discovery" :
{
"enable" : "true",
"multicast" : "224.224.224.245",
"port" : "30490",
"protocol" : "udp",
"initial_delay_min" : "10",
"initial_delay_max" : "100",
"repetitions_base_delay" : "200",
"repetitions_max" : "3",
"ttl" : "3",
"cyclic_offer_delay" : "2000",
"request_response_delay" : "1500"
}
}
使用 wireshark 对 Vmware Network Adapter VMnet8 进行抓包,通信正常:

参考链接
- https://github.com/COVESA/vsomeip/wiki/vsomeip-in-10-minutes vsomeip官方文档
- https://github.com/COVESA/vsomeip/wiki/vsomeip-in-10-minutes#protocol
- https://zhuanlan.zhihu.com/p/405534988
- vsomeip开源项目跑通过程 | 码农家园
- [someip专题]vsomeip使用以及代码解析1_AgingMoon的博客-CSDN博客_vsomeip
- 快速上手 vsomeip
版权声明
本站“技术博客”所有内容的版权持有者为绿盟科技集团股份有限公司(“绿盟科技”)。作为分享技术资讯的平台,绿盟科技期待与广大用户互动交流,并欢迎在标明出处(绿盟科技-技术博客)及网址的情形下,全文转发。
上述情形之外的任何使用形式,均需提前向绿盟科技(010-68438880-5462)申请版权授权。如擅自使用,绿盟科技保留追责权利。同时,如因擅自使用博客内容引发法律纠纷,由使用者自行承担全部法律责任,与绿盟科技无关。
